
Getting Started
To access the Calendar service, click on the Dashboard icon in the upper right corner.

Next select the Calendar tab.

In the Calendar service area, you will see three tabs and a create new event button.

Manage Events Is where you will view and manage all events.
Manage Categories is where you can create and manage categories for your events.
Calendar Configuration is where you will configure the settings for your site calendar.
Calendar Configuration
When beginning with the Calendar, it’s best to start by setting your preferences. In the Calendar Configuration section, you will find settings that can be adjusted for Front End Features, which are settings that are visible on the viewable calendar, as well as Event Features, which are features that are specific to the actual event listing itself.

Enable Accessibility: Allows the ability to choose Accessibility options.
Enable Media: Allows for image uploads of the event.
Manage Categories
Categories provides the ability to group events together. To create a category, in the Manage Categories tab, enter in a name for your category and click create. You will see all created categories listed. To delete a category, click the trash icon on the right side.

To edit the name of your category, simply click edit icon to bring up the edit box. 

Manage Events
Events can be created at any time by selecting the ‘Create Event’ button in the right corner of the Calendar menu.

You will then be taken the to Event window where you fill out the details regarding your event.

From here you can edit the event name, start and end times as well as date. You choose if this date is to be an all day event or a recurring event using the respective toggles

Note: The default time (CST) will be listed unless otherwise changed in the Account Info section of your Dashboard.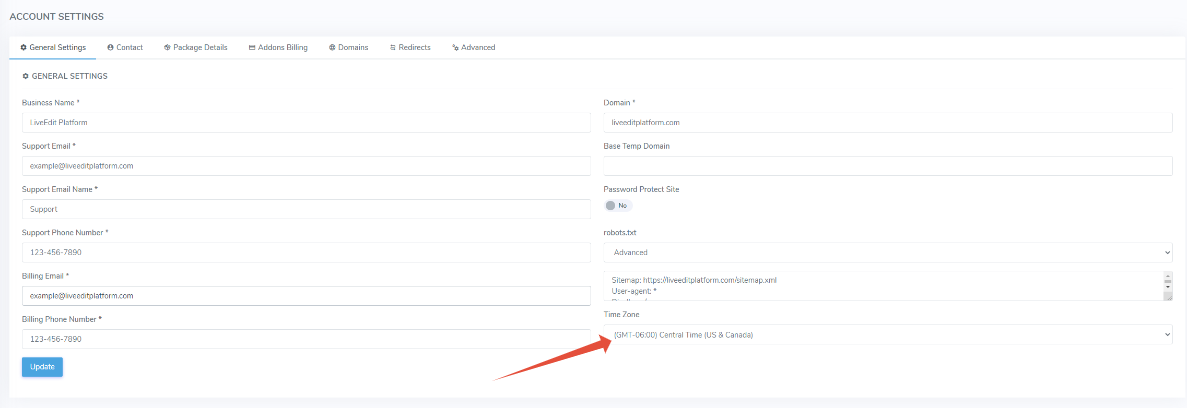
Details tab: Details regarding the event.
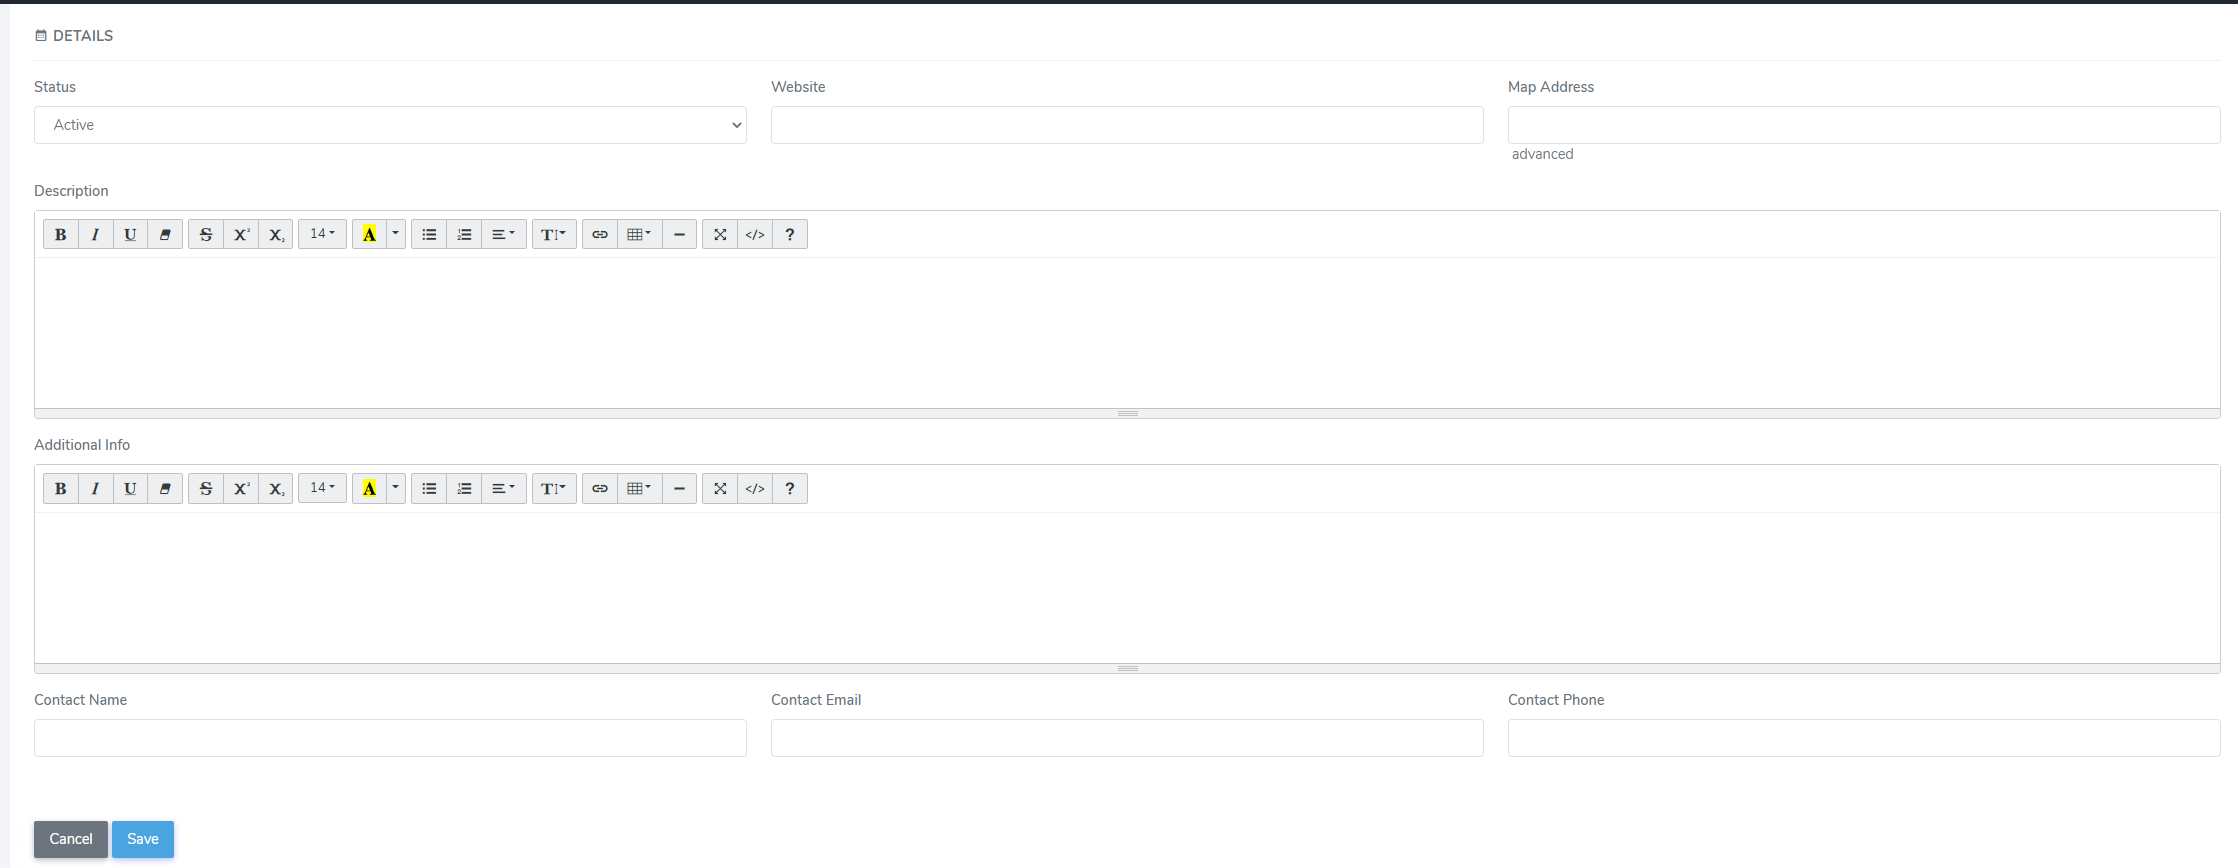
- Status - ‘Active’ events will display in Calendar view. ‘Pending’ events are hidden from view. ‘Cancel’ will cancel an event.
- Website - Provide a web address link for event if available.
- Map Address - Input the physical location for the event to display in Map format.
- Description - Add a description or summary of event.
- Additional Info - Add in any additional information.
- Contact Name, Contact Email, Contact Phone - provide contact information for event.
Categories Tab: Apply categories to created events as well as add keyword tags.

- Category - Select a primary category for an event.
- Secondary Category - Select a second category for an event.
Details tab: Details regarding the event.
- Status - ‘Active’ events will display in Calendar view. ‘Pending’ events are hidden from view. ‘Cancel’ will cancel an event.
- Website - Provide a web address link for event if available.
- Map Address - Input the physical location for the event to display in Map format.
- Description - Add a description or summary of event.
- Additional Info - Add in any additional information.
- Contact Name, Contact Email, Contact Phone - provide contact information for event.
Categories Tab: Apply categories to created events as well as add keyword tags.
- Category - Select a primary category for an event.
- Secondary Category - Select a second category for an event.
When you have your event set up, click the ‘Save’ button in the upper right corner. Your event will now display in the Manage Events section.

Events Name: Search for events by name.
Status: Sort events according to status.
Category: Sort events by category.
To edit an event, click on the name of the event to be taken back to the Event window to make any changes. To delete an event, click on the trash can icon.
Calendar Element
 The Calendar Element allows you to display a summary of upcoming events on any page of your website.
Dragging and dropping the element onto a page will open up the element edit window. Adjust the settings for the event information you would like to display, and save your changes.

Event information displayed with Calendar Element
